Who doesn’t love a garden overflowing with fragrant lavender—especially when you can grow it for free? That’s where propagation comes in. Many assume this means starting plants from seed, but lavender plays by its own rules.
For instance, Lavandula x intermedia doesn’t produce seeds at all, and even seed-bearing varieties like Lavandula angustifolia don’t always pass on their best traits. That’s why most gardeners prefer propagation from cuttings—it’s faster, easier, and guarantees a perfect replica of your favorite plant.
The best part? Growing lavender from cuttings is simpler than it looks. You can take softwood cuttings in spring for planting in autumn or hardwood cuttings in autumn for planting the following spring.
Here’s a clear, step-by-step guide to help you multiply your lavender plants with confidence.
When to Take Lavender Cuttings

There are two ideal times of the year to take lavender cuttings—spring and late summer.
Late Summer (June to September)
This is generally the best time for propagation, right after the lavender finishes blooming. In August or September, take semi-hardwood cuttings—stems that are beginning to harden at the base but remain flexible at the tip.
These cuttings are sturdier than spring ones and less likely to dry out. They root well in the lingering warmth of late summer, giving them time to establish before winter. Just keep the soil lightly moist and provide indirect light. By the time spring returns, they’ll be ready for the garden.
Spring (May to June)
Spring is perfect for softwood cuttings, taken when new growth is tender and green. These herbaceous tips root quickly and begin growing within weeks, which helps them get established before colder weather arrives. However, they’re delicate—keep them consistently moist by misting, but don’t overwater, or they’ll rot.
How to Propagate Lavender from Cuttings in Spring
Step 1: Prepare the Pot
Fill a pot with a 50/50 mix of potting soil and river sand, or use a quality seed-starting mix. Moisten the soil thoroughly to create the right environment for rooting.
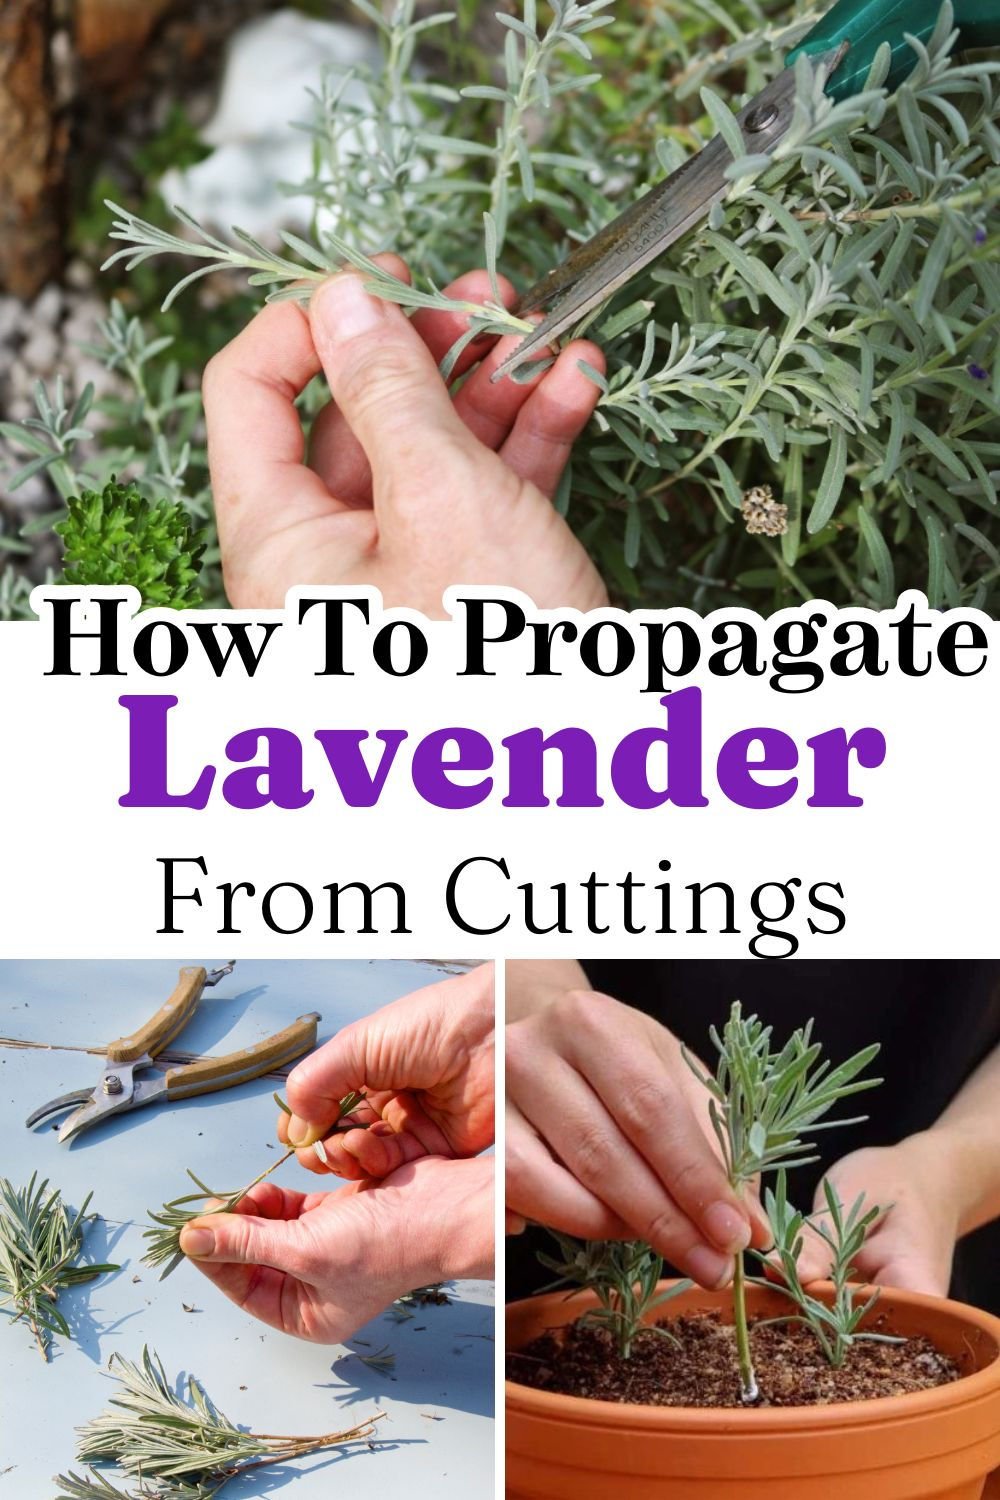
Step 2: Select and Trim the Cuttings

Choose healthy, non-flowering shoots from your “mother plant,” about 8–10 cm long. Make a clean cut just below a leaf node (the point where leaves meet the stem).
Step 3: Dress the Cuttings
Strip the leaves from the bottom half of the cutting to prevent rot. Trim the remaining top leaves in half to reduce water loss through evaporation.
Step 4: Plant the Cuttings

Use a pencil or stick to make small holes around the edge of the pot—this improves drainage and spacing. Insert the cuttings and gently press the soil around them to hold them upright.
Step 5: Water and Position
Water gently to settle the soil. Place the pot in a shaded, sheltered area—such as under a greenhouse frame, a veranda, or even near a hedge. Cover the pot with a clear plastic bag or a cut plastic bottle to trap humidity, and open it occasionally to allow airflow and prevent mold.
Step 6: Ongoing Care
Keep the soil damp but never soggy. Once you notice new growth, maintain light moisture and let the cuttings strengthen naturally.
How to Propagate Lavender from Cuttings in Late Summer
Late summer is another excellent time to create new lavender plants. Follow these simple steps:
Step 1: Prepare the Pot
Use a seed tray or a terracotta pot filled with a mix of potting soil and sand. Water lightly to moisten the mix before planting.
Step 2: Select and Prepare Cuttings
Choose semi-hardwood shoots about 15–20 cm long that are starting to turn woody. Avoid stems that have already flowered. Strip the lower half of leaves and trim the top leaves in half to minimize moisture loss.
Step 3: Plant the Cuttings
Insert each cutting into the prepared soil, spacing them evenly. Firm the soil gently around each stem to secure it.

Step 4: Monitor and Care
Keep the soil consistently moist—humidity is key. When new shoots appear, gradually reduce watering and allow them to harden over winter.
Step 5: Winter Protection
Once the cuttings are rooted, stop watering regularly and move them to a sheltered location like a cold frame or veranda to protect from frost.
Step 6: Spring Planting
By spring, your lavender cuttings should be well established. Give the tips a light trim to encourage bushier growth before planting them out in the garden.
With a little care and patience, you can turn one lavender plant into many—filling your garden with color, fragrance, and charm, all without spending a cent.